No edit summary Tags: Reverted 2017 source edit |
m (Changed the border color for the Mines tab to match the in-game custom elevator color for the Mines.) |
||
| (478 intermediate revisions by 98 users not shown) | |||
| Line 1: | Line 1: | ||
{{About|Entities|[[Hazards]]}} |
{{About|Entities|[[List of Hazards|Hazards]]}} |
||
'''Entities''' are the main roadblocks |
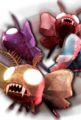
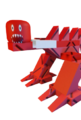
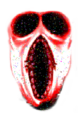
'''Entities''' are the main roadblocks in ''[[DOORS]]''. Many of them try to kill [[players]] and they must face them in order to advance. They all differ in mechanics and difficulty, along with some being encountered more rarely than others. Certain audio cues or visual imagery can warn the player before an ''entity'' spawns in. |
||
== {{Icons|Behavior}} List of Entities == |
== {{Icons|Behavior}} List of Entities == |
||
<tabber> |
<tabber> |
||
|-| The Hotel = |
|-| The Hotel = |
||
{| style="width:100%; text-align:center; padding: |
{| style="width:100%; text-align:center; padding:20px" |
||
! colspan=5 style="font-size:170%" | |
! colspan=5 style="font-size:170%" | |
||
<p style="margin:0"> |
<p style="margin:0">'''[[The Hotel|THE HOTEL]]'''</p> |
||
|} |
|} |
||
| Line 14: | Line 13: | ||
! colspan=5 | |
! colspan=5 | |
||
{| style="width:100%; text-align:center; padding: |
{| style="width:100%; text-align:center; padding:20px" |
||
! colspan=5 style="font-size:130%" | |
! colspan=5 style="font-size:130%" | |
||
<p style="margin:0"> |
<p style="margin:0">'''MAIN'''</p> |
||
|} |
|} |
||
| Line 23: | Line 22: | ||
Seek Icon2.png|link=Seek|'''[[Seek|SEEK]]''' |
Seek Icon2.png|link=Seek|'''[[Seek|SEEK]]''' |
||
Guiding Light List of entities.png|link=Guiding Light|'''[[Guiding Light|GUIDING LIGHT]]''' |
Guiding Light List of entities.png|link=Guiding Light|'''[[Guiding Light|GUIDING LIGHT]]''' |
||
</gallery></div> |
</gallery> </div> |
||
{| style="width:100%; text-align:center; padding: |
{| style="width:100%; text-align:center; padding:20px" |
||
! colspan=5 style="font-size:130%" | |
! colspan=5 style="font-size:130%" | |
||
<p style="margin:0"> |
<p style="margin:0">'''RECURRING'''</p> |
||
|} |
|} |
||
| Line 33: | Line 32: | ||
Rush Icon.png|link=Rush|'''[[Rush|RUSH]]''' |
Rush Icon.png|link=Rush|'''[[Rush|RUSH]]''' |
||
Ambush Icon1.png|link=Ambush|'''[[Ambush|AMBUSH]]''' |
Ambush Icon1.png|link=Ambush|'''[[Ambush|AMBUSH]]''' |
||
Eyes Icon6.png|link=Eyes|'''[[Eyes|THE EYES]]''' |
|||
Eyes Icon6.png|link=Eyes|'''[[Eyes|EYES]]''' |
|||
Screech Icon.png|link=Screech|'''[[Screech|SCREECH]]''' |
Screech Icon.png|link=Screech|'''[[Screech|SCREECH]]''' |
||
Dupe icon Hotel.png|link=Dupe|'''[[Dupe|DUPE]]''' |
Dupe icon Hotel.png|link=Dupe|'''[[Dupe|DUPE]]''' |
||
| Line 40: | Line 38: | ||
</div> |
</div> |
||
{| style="width:100%; text-align:center; padding: |
{| style="width:100%; text-align:center; padding:20px" |
||
! colspan=5 style="font-size:130%" | |
! colspan=5 style="font-size:130%" | |
||
<p style="margin:0"> |
<p style="margin:0">'''MISCELLANEOUS'''</p> |
||
|} |
|} |
||
<div class="hoverimg-dim"> |
<div class="hoverimg-dim"> |
||
<gallery navigation="true" captionalign="center" widths="320" bordercolor="#D0AE82" bordersize="medium" position="center"> |
<gallery navigation="true" captionalign="center" widths="320" bordercolor="#D0AE82" bordersize="medium" position="center"> |
||
Halt Icon2.png|link=Halt|'''[[Halt|HALT]]''' |
|||
Hotel Hide Icon.png|link=Hide|'''[[Hide|HIDE]]''' |
|||
jacicon.png|link=Jack|'''[[Jack|JACK]]''' |
|||
Timothy Icon3.png|link=Timothy|'''[[Timothy|TIMOTHY]]''' |
Timothy Icon3.png|link=Timothy|'''[[Timothy|TIMOTHY]]''' |
||
Dread.webp|link=Dread|'''[[Dread|DREAD]]''' |
Dread.webp|link=Dread|'''[[Dread|DREAD]]''' |
||
Snareicon3.png|link=Snare|'''[[Snare|SNARE]]''' |
|||
Sally icon.png|link=Sally|'''[[Sally|SALLY]]''' |
Sally icon.png|link=Sally|'''[[Sally|SALLY]]''' |
||
Void icon.png|link=Void|'''[[Void|VOID]]''' |
Void new icon.png|link=Void|'''[[Void|VOID]]''' |
||
Goblinicon3.png|link=El Goblino|'''[[El Goblino|EL GOBLINO]]''' |
|||
Jeffclose.jpg|link=Jeff|'''[[Jeff|JEFF]]''' |
|||
Bobicon2.png|link=Bob|'''[[Bob|BOB]]''' |
|||
Shadow icon.png|link=Shadow|'''[[Shadow|SHADOW]]''' |
Shadow icon.png|link=Shadow|'''[[Shadow|SHADOW]]''' |
||
Curious Light Icon.png|link=Curious Light|'''[[Curious Light|CURIOUS LIGHT]]''' |
Curious Light Icon.png|link=Curious Light|'''[[Curious Light|CURIOUS LIGHT]]''' |
||
</gallery> |
</gallery></div> |
||
</div> |
|||
|} |
|} |
||
|-| The Mines = |
|-| The Mines = |
||
{| style="width:100%; text-align:center; padding: |
{| style="width:100%; text-align:center; padding:20px" |
||
! colspan=5 style="font-size:170%" | |
! colspan=5 style="font-size:170%" | |
||
<p style="margin:0"> |
<p style="margin:0">'''[[The Mines|THE MINES]]'''</p> |
||
|} |
|} |
||
| Line 73: | Line 71: | ||
! colspan=5 | |
! colspan=5 | |
||
{| style="width:100%; text-align:center; padding: |
{| style="width:100%; text-align:center; padding:20px" |
||
! colspan=5 style="font-size:130%" | |
! colspan=5 style="font-size:130%" | |
||
<p style="margin:0"> |
<p style="margin:0">'''MAIN'''</p> |
||
|} |
|} |
||
<div class="hoverimg-dim"><gallery navigation="true" captionalign="center" widths="320" bordercolor="# |
<div class="hoverimg-dim"><gallery navigation="true" captionalign="center" widths="320" bordercolor="#E5FFFF" bordersize="medium" position="center"> |
||
Seek Icon2.png|link=Seek|'''[[Seek|SEEK]]''' |
|||
Figure Icon2.png|link=Figure|'''[[Figure|FIGURE]]''' |
Figure Icon2.png|link=Figure|'''[[Figure|FIGURE]]''' |
||
Seek Icon2.png|link=Seek|'''[[Seek|SEEK]]''' |
|||
Queengrumble list of entities.png|link=Queen Grumble|'''[[Queen Grumble|QUEEN GRUMBLE]]''' |
Queengrumble list of entities.png|link=Queen Grumble|'''[[Queen Grumble|QUEEN GRUMBLE]]''' |
||
Grumble big.png|link=Grumble|'''[[Grumble|GRUMBLE]]''' |
Grumble big.png|link=Grumble|'''[[Grumble|GRUMBLE]]''' |
||
Guiding Light List of entities.png|link=Guiding Light|'''[[Guiding Light|GUIDING LIGHT]]''' |
Guiding Light List of entities.png|link=Guiding Light|'''[[Guiding Light|GUIDING LIGHT]]''' |
||
</gallery |
</gallery> |
||
</div> |
|||
{| style="width:100%; text-align:center; padding: |
{| style="width:100%; text-align:center; padding:20px" |
||
! colspan=5 style="font-size:130%" | |
! colspan=5 style="font-size:130%" | |
||
<p style="margin:0"> |
<p style="margin:0">'''RECURRING'''</p> |
||
|} |
|} |
||
<div class="hoverimg-dim"><gallery navigation="true" captionalign="center" widths="300" bordercolor="# |
<div class="hoverimg-dim"><gallery navigation="true" captionalign="center" widths="300" bordercolor="#E5FFFF" bordersize="medium" position="center"> |
||
Giggle icon.png|link=Giggle|'''[[Giggle|GIGGLE]]''' |
Giggle icon.png|link=Giggle|'''[[Giggle|GIGGLE]]''' |
||
BatmothRender.png|link=Gloombats|'''[[Gloombats|GLOOMBATS]]''' |
BatmothRender.png|link=Gloombats|'''[[Gloombats|GLOOMBATS]]''' |
||
Rush Icon.png|link=Rush|'''[[Rush|RUSH]]''' |
Rush Icon.png|link=Rush|'''[[Rush|RUSH]]''' |
||
Ambush Icon1.png|link=Ambush|'''[[Ambush|AMBUSH]]''' |
Ambush Icon1.png|link=Ambush|'''[[Ambush|AMBUSH]]''' |
||
Halt Icon2.png|link=Halt|'''[[Halt|HALT]]''' |
|||
Eyes Icon6.png|link=Eyes|'''[[Eyes|EYES]]''' |
Eyes Icon6.png|link=Eyes|'''[[Eyes|EYES]]''' |
||
Screech Icon.png|link=Screech|'''[[Screech|SCREECH]]''' |
Screech Icon.png|link=Screech|'''[[Screech|SCREECH]]''' |
||
| Line 103: | Line 101: | ||
</div> |
</div> |
||
{| style="width:100%; text-align:center; padding: |
{| style="width:100%; text-align:center; padding:20px" |
||
! colspan=5 style="font-size:130%" | |
! colspan=5 style="font-size:130%" | |
||
<p style="margin:0"> |
<p style="margin:0">'''MISCELLANEOUS'''</p> |
||
|} |
|} |
||
<div class="hoverimg-dim"> |
<div class="hoverimg-dim"> |
||
<gallery navigation="true" captionalign="center" widths="320" bordercolor="# |
<gallery navigation="true" captionalign="center" widths="320" bordercolor="#E5FFFF" bordersize="medium" position="center"> |
||
Louie_Icon.png|link=Louie|'''[[Louie|LOUIE]]''' |
|||
Halt Icon2.png|link=Halt|'''[[Halt|HALT]]''' |
|||
Hide Icon0.png|link=Hide|'''[[Hide|HIDE]]''' |
Hide Icon0.png|link=Hide|'''[[Hide|HIDE]]''' |
||
Louie_Icon.png|link=Louie|'''[[Louie|LOUIE]]''' |
|||
jacicon.png|link=Jack|'''[[Jack|JACK]]''' |
|||
Timothy Icon3.png|link=Timothy|'''[[Timothy|TIMOTHY]]''' |
Timothy Icon3.png|link=Timothy|'''[[Timothy|TIMOTHY]]''' |
||
Dread.webp|link=Dread|'''[[Dread|DREAD]]''' |
Dread.webp|link=Dread|'''[[Dread|DREAD]]''' |
||
Void icon.png|link=Void|'''[[Void|VOID]]''' |
Void new icon.png|link=Void|'''[[Void|VOID]]''' |
||
Goblinicon3.png|link=El Goblino|'''[[El Goblino|EL GOBLINO]]''' |
|||
Jeff Mines Icon.png|link=Jeff|'''[[Jeff|JEFF]]''' |
Jeff Mines Icon.png|link=Jeff|'''[[Jeff|JEFF]]''' |
||
Bob Mines Icon.png|link=Bob|'''[[Bob|BOB]]''' |
Bob Mines Icon.png|link=Bob|'''[[Bob|BOB]]''' |
||
Shadow icon.png|link=Shadow|'''[[Shadow|SHADOW]]''' |
Shadow icon.png|link=Shadow|'''[[Shadow|SHADOW]]''' |
||
Curious Light Icon.png|link=Curious Light|'''[[Curious Light|CURIOUS LIGHT]]''' |
|||
</gallery> |
|||
</div> |
</gallery></div> |
||
|} |
|} |
||
|-| |
|-| The Backdoor = |
||
{| style="width:100%; text-align:center; padding: |
{| style="width:100%; text-align:center; padding:20px" |
||
! colspan=5 style="font-size:170%" | |
! colspan=5 style="font-size:170%" | |
||
<p style="margin:0"> |
<p style="margin:0">'''[[The Backdoor|THE BACKDOOR]]'''</p> |
||
|} |
|} |
||
| Line 134: | Line 134: | ||
! colspan=5 | |
! colspan=5 | |
||
{| style="width:100%; text-align:center; padding: |
{| style="width:100%; text-align:center; padding:20px" |
||
! colspan=5 style="font-size:130%" | |
! colspan=5 style="font-size:130%" | |
||
<p style="margin:0"> |
<p style="margin:0">'''MAIN'''</p> |
||
|} |
|} |
||
<div class="hoverimg-dim"><gallery navigation="true" captionalign="center" widths="320" bordercolor="#D0AE82" bordersize="medium" position="center"> |
<div class="hoverimg-dim"><gallery navigation="true" captionalign="center" widths="320" bordercolor="#D0AE82" bordersize="medium" position="center"> |
||
HasteListOfEntities.png|link=The Backdoor#Haste|'''[[The Backdoor#Haste|HASTE]]''' |
|||
Curious Light Icon.png|link=Curious Light|'''[[Curious Light|CURIOUS LIGHT]]''' |
Curious Light Icon.png|link=Curious Light|'''[[Curious Light|CURIOUS LIGHT]]''' |
||
</gallery> |
</gallery> |
||
</div> |
</div> |
||
{| style="width:100%; text-align:center; padding: |
{| style="width:100%; text-align:center; padding:20px" |
||
! colspan=5 style="font-size:130%" | |
! colspan=5 style="font-size:130%" | |
||
<p style="margin:0"> |
<p style="margin:0">'''RECURRING'''</p> |
||
|} |
|} |
||
<div class="hoverimg-dim"> |
<div class="hoverimg-dim"> |
||
<gallery navigation="true" captionalign="center" widths="320" bordercolor="#D0AE82" bordersize="medium" position="center"> |
<gallery navigation="true" captionalign="center" widths="320" bordercolor="#D0AE82" bordersize="medium" position="center"> |
||
BlitzRender.png|link=Blitz|'''[[Blitz|BLITZ]]''' |
BlitzRender.png|link=The Backdoor#Blitz|'''[[The Backdoor#Blitz|BLITZ]]''' |
||
Lookman with eyes.png|link=Lookman|'''[[Lookman|LOOKMAN]]''' |
Lookman with eyes.png|link=The Backdoor#Lookman|'''[[The Backdoor#Lookman|LOOKMAN]]''' |
||
</gallery> |
</gallery> |
||
</div> |
</div> |
||
|} |
|} |
||
|-| The Rooms = |
|||
{| style="width:100%; text-align:center; padding: |
{| style="width:100%; text-align:center; padding:20px" |
||
! colspan=5 style="font-size:170%" | |
! colspan=5 style="font-size:170%" | |
||
<p style="margin:0"> |
<p style="margin:0">'''[[The Rooms|THE ROOMS]]'''</p> |
||
|} |
|} |
||
| Line 167: | Line 167: | ||
! colspan=5 | |
! colspan=5 | |
||
{| style="width:100%; text-align:center; padding: |
{| style="width:100%; text-align:center; padding:20px" |
||
! colspan=5 style="font-size:130%" | |
! colspan=5 style="font-size:130%" | |
||
<p style="margin:0"> |
<p style="margin:0">'''MAIN'''</p> |
||
|} |
|} |
||
| Line 177: | Line 177: | ||
</div> |
</div> |
||
{| style="width:100%; text-align:center; padding: |
{| style="width:100%; text-align:center; padding:20px" |
||
! colspan=5 style="font-size:130%" | |
! colspan=5 style="font-size:130%" | |
||
<p style="margin:0"> |
<p style="margin:0">'''RECURRING'''</p> |
||
|} |
|} |
||
<div class="hoverimg-dim"> |
<div class="hoverimg-dim"> |
||
<gallery navigation="true" captionalign="center" widths="320" bordercolor="#D0AE82" bordersize="medium" position="center"> |
<gallery navigation="true" captionalign="center" widths="320" bordercolor="#D0AE82" bordersize="medium" position="center"> |
||
A-60 icon.png|link=A-60|'''[[A-60]]''' |
A-60 icon.png|link=A-60|'''[[The Rooms#A-60|A-60]]''' |
||
A-90 icon.png|link=A-90|'''[[A-90]]''' |
A-90 icon.png|link=A-90|'''[[The Rooms#A-90|A-90]]''' |
||
A-120 icon.png|link=A-120|'''[[A-120]]''' |
A-120 icon.png|link=A-120|'''[[The Rooms#A-120|A-120]]''' |
||
</gallery> |
</gallery> |
||
</div> |
</div> |
||
| Line 193: | Line 193: | ||
|-| April Fools = |
|-| April Fools = |
||
{| style="width:100%; text-align:center; padding: |
{| style="width:100%; text-align:center; padding:20px" |
||
! colspan=5 style="font-size:170%" | |
! colspan=5 style="font-size:170%" | |
||
<p style="margin:0"> |
<p style="margin:0">'''[[2023 April Fools Event|SUPER HARD MODE!!!]]'''</p> |
||
|} |
|} |
||
| Line 201: | Line 201: | ||
! colspan=5 | |
! colspan=5 | |
||
{| style="width:100%; text-align:center; padding: |
{| style="width:100%; text-align:center; padding:20px" |
||
! colspan=5 style="font-size:130%" | |
! colspan=5 style="font-size:130%" | |
||
<p style="margin:0"> |
<p style="margin:0">'''NEW'''</p> |
||
|} |
|} |
||
<div class="hoverimg-dim"><gallery navigation="true" captionalign="center" widths="320" bordercolor="#D0AE82" bordersize="medium" position="center"> |
<div class="hoverimg-dim"><gallery navigation="true" captionalign="center" widths="320" bordercolor="#D0AE82" bordersize="medium" position="center"> |
||
WhyisFigureNoobNotJohnDoe.png|link=Figure|'''[[Noob Figure|NOOB FIGURE]]''' |
|||
YAYYYFIGUREJOGNDOE.png|link=Figure|'''[[John Doe Figure|JOHN DOE FIGURE]]''' |
|||
I woke up in a BUGGATI!.png|link=Seek|'''[[Seek|SEEK]]''' |
|||
Jeffthekillericon.png|link=2023 April Fools Event#Jeff The Killer|'''[[2023 April Fools Event#Jeff The Killer|JEFF THE KILLER]]''' |
Jeffthekillericon.png|link=2023 April Fools Event#Jeff The Killer|'''[[2023 April Fools Event#Jeff The Killer|JEFF THE KILLER]]''' |
||
Greed_icon.png|link=2023 April Fools Event#Greed|'''[[2023 April Fools Event#Greed|GREED]]''' |
|||
Guiding Light List of entities.png|link=Guiding Light|'''[[Guiding Light|GUIDING LIGHT]]''' |
|||
Subspacetripmine.png|link=2023 April Fools Event#Subspace Tripmine|'''[[2023 April Fools Event#Subspace Tripmine|SUBSPACE TRIPMINE]]''' |
|||
</gallery></div> |
</gallery></div> |
||
{| style="width:100%; text-align:center; padding: |
{| style="width:100%; text-align:center; padding:20px" |
||
! colspan=5 style="font-size:130%" | |
! colspan=5 style="font-size:130%" | |
||
<p style="margin:0"> |
<p style="margin:0">'''RESKIN'''</p> |
||
|} |
|} |
||
<div class="hoverimg-dim"><gallery navigation="true" captionalign="center" widths=" |
<div class="hoverimg-dim"><gallery navigation="true" captionalign="center" widths="320" bordercolor="#D0AE82" bordersize="medium" position="center"> |
||
Seekjeep_icon.png|link=2023 April Fools Event#Jeep Seek|'''[[2023 April Fools Event#Jeep Seek|SEEK]]''' |
|||
Rush Clones Icon.png|link=2023 April Fools Event#Rush Clones|'''[[2023 April Fools Event#Rush Clones|RUSH CLONES]]''' |
|||
Soyjackicon.png|link=2023 April Fools Event#Soyjack|'''[[2023 April Fools Event#Soyjack|SOYJACK]]''' |
|||
Noobicon.png|link=2023 April Fools Event#Noob Figure|'''[[2023 April Fools Event#Noob Figure|NOOB FIGURE]]''' |
|||
Halt Icon2.png|link=Halt|'''[[Halt|HALT]]''' |
|||
Johndoe_icon.png|link=2023 April Fools Event#John Doe Figure|'''[[2023 April Fools Event#John Doe Figure|JOHN DOE FIGURE]]''' |
|||
Eyes Icon6.png|link=Eyes|'''[[Eyes|EYES]]''' |
|||
</gallery></div> |
|||
Screech Icon.png|link=Screech|'''[[Screech|SCREECH]]''' |
|||
Subspace_icon.png|link=2023 April Fools Event#Subspace Tripmine|'''[[2023 April Fools Event#Subspace Tripmine|SUBSPACE TRIPMINE]]''' |
|||
Greed_icon.png|link=2023 April Fools Event#Greed|'''[[2023 April Fools Event#Greed|GREED]]''' |
|||
</gallery> |
|||
</div> |
|||
{| style="width:100%; text-align:center; padding: 20px:" |
|||
! colspan=5 style="font-size:130%" | |
|||
<p style="margin:0"><b>MISCELLANEOUS</b></p> |
|||
|} |
|||
<div class="hoverimg-dim"> |
|||
<gallery navigation="true" captionalign="center" widths="320" bordercolor="#D0AE82" bordersize="medium" position="center"> |
|||
Evic.png|link=Hide|'''[[Hide|HIDE]]''' |
|||
Soyjack.png|link=Jack|'''[[Jack|SOYJACK]]''' |
|||
Timothy Icon3.png|link=Timothy|'''[[Timothy|TIMOTHY]]''' |
|||
Void icon.png|link=Void|'''[[Void|VOID]]''' |
|||
ElGoblino Icon.png|link=El Goblino|'''[[El Goblino|EL GOBLINO]]''' |
|||
JeffRender.png|link=Jeff|'''[[Jeff|JEFF]]''' |
|||
Bob Icon.png|link=Bob|'''[[Bob|BOB]]''' |
|||
Shadow icon.png|link=Shadow|'''[[Shadow|SHADOW]]''' |
|||
Evilkey_icon.png|link=2023 April Fools Event#Evil Key|'''[[2023 April Fools Event#Evil Key|EVIL KEY]]''' |
|||
Snare Entity.png|link=Snare|'''[[Snare|SNARE]]''' |
|||
Curious Light Icon.png|link=Curious Light|'''[[Curious Light|CURIOUS LIGHT]]''' |
|||
</gallery> |
|||
</div> |
|||
|} |
|} |
||
{| style="width:100%; text-align:center; padding: |
{| style="width:100%; text-align:center; padding:20px" |
||
! colspan=5 style="font-size:170%" | |
! colspan=5 style="font-size:170%" | |
||
<p style="margin:0"> |
<p style="margin:0">'''[[2024 April Fools Event|RETRO MODE]]'''</p> |
||
|} |
|} |
||
| Line 261: | Line 234: | ||
! colspan=5 | |
! colspan=5 | |
||
{| style="width:100%; text-align:center; padding: |
{| style="width:100%; text-align:center; padding:20px" |
||
! colspan=5 style="font-size:130%" | |
! colspan=5 style="font-size:130%" | |
||
<p style="margin:0"> |
<p style="margin:0">'''NEW'''</p> |
||
|} |
|} |
||
<div class="hoverimg-dim"><gallery navigation="true" captionalign="center" widths="320" bordercolor="#D0AE82" bordersize="medium" position="center"> |
<div class="hoverimg-dim"><gallery navigation="true" captionalign="center" widths="320" bordercolor="#D0AE82" bordersize="medium" position="center"> |
||
DrakobloxxersRender.png|link=2024 April Fools Event#DRAKOBLOXXERS|'''[[2024 April Fools Event#DRAKOBLOXXERS|DRAKOBLOXXER]]''' |
|||
Retro_figure_icon.png|link=2024 April Fools Event#Retro Figure|'''[[2024 April Fools Event#Retro Figure|FIGURE]]''' |
|||
Seekwall_icon.png|link=2024 April Fools Event#SEEKING WALL!!!!|'''[[2024 April Fools Event#SEEKING WALL!!!!|SEEKING WALL!!!!]]''' |
Seekwall_icon.png|link=2024 April Fools Event#SEEKING WALL!!!!|'''[[2024 April Fools Event#SEEKING WALL!!!!|SEEKING WALL!!!!]]''' |
||
DrakobloxxersRender.png|link=2024 April Fools Event#DRAKOBLOXXERS|'''[[2024 April Fools Event#DRAKOBLOXXERS|DRAKOBLOXXER]]''' |
|||
Guiding Light List of entities.png|link=Guiding Light|'''[[Guiding Light|GUIDING LIGHT]]''' |
|||
</gallery></div> |
</gallery></div> |
||
{| style="width:100%; text-align:center; padding: |
{| style="width:100%; text-align:center; padding:20px" |
||
! colspan=5 style="font-size:130%" | |
! colspan=5 style="font-size:130%" | |
||
<p style="margin:0"> |
<p style="margin:0">'''RESKIN'''</p> |
||
|} |
|||
<div class="hoverimg-dim"><gallery navigation="true" captionalign="center" widths="300" bordercolor="#D0AE82" bordersize="medium" position="center"> |
|||
Rushretrorender.png|link=Rush|'''[[Rush|RUSH]]''' |
|||
Retro ambush.png|link=Ambush|'''[[Ambush|AMBUSH]]''' |
|||
Literalballofeyesbetter.png|link=Eyes|'''[[Eyes|EYES]]''' |
|||
Geometric screech.png|link=Screech|'''[[Screech|SCREECH]]''' |
|||
</gallery> |
|||
</div> |
|||
{| style="width:100%; text-align:center; padding: 20px:" |
|||
! colspan=5 style="font-size:130%" | |
|||
<p style="margin:0"><b>MISCELLANEOUS</b></p> |
|||
|} |
|||
<div class="hoverimg-dim"> |
|||
<gallery navigation="true" captionalign="center" widths="320" bordercolor="#D0AE82" bordersize="medium" position="center"> |
|||
Retro goblino.png|link=El Goblino|'''[[El Goblino|EL GOBLINO]]''' |
|||
Retro jeff.png|link=Jeff|'''[[Jeff|JEFF]]''' |
|||
Retro bob.png|link=Bob|'''[[Bob|BOB]]''' |
|||
FigureRetro.png|link=Figure|'''[[Figure|FIGURE]]''' |
|||
</gallery> |
|||
</div> |
|||
|} |
|||
|-| Other = |
|||
{| style="width:100%; text-align:center; padding: 20px:" |
|||
! colspan=5 style="font-size:170%" | |
|||
<p style="margin:0"><b>[[:Category:Miscellaneous|MISCELLANEOUS]]</b></p> |
|||
|} |
|||
{| class="table home-container" style="width:100%; border-radius:1em; text-align:center; padding:5px" |
|||
! colspan=5 | |
|||
{| style="width:100%; text-align:center; padding: 20px:" |
|||
! colspan=5 style="font-size:130%" | |
|||
<p style="margin:0"><b>GLITCH ENTITIES</b></p> |
|||
|} |
|} |
||
<div class="hoverimg-dim"><gallery navigation="true" captionalign="center" widths="320" bordercolor="#D0AE82" bordersize="medium" position="center"> |
<div class="hoverimg-dim"><gallery navigation="true" captionalign="center" widths="320" bordercolor="#D0AE82" bordersize="medium" position="center"> |
||
Rush_sphere_icon.png|link=2024 April Fools Event#Retro Rush|'''[[2024 April Fools Event#Retro Rush|RUSH]]''' |
|||
Glitch Icon.png|link=Glitch|'''[[Glitch|GLITCH]]''' |
|||
Ambush_april_fools_icon.png|link=2024 April Fools Event#Retro Ambush|'''[[2024 April Fools Event#Retro Ambush|AMBUSH]]''' |
|||
Rushglitch.png|link=RNIUSHCg==|'''[[RNIUSHCg==|RNIUSHCG==]]''' |
|||
Eyeball_icon.png|link=2024 April Fools Event#Retro Eyes|'''[[2024 April Fools Event#Retro Eyes|EYES]]''' |
|||
Ambush_glitch.png|link=AROxMBUSH|'''[[AROxMBUSH|AROXMBUSH]]''' |
|||
Retro_screech.png|link=2024 April Fools Event#Retro Screech|'''[[2024 April Fools Event#Retro Screech|SCREECH]]''' |
|||
Corrupted_Screeches_Icon.png|link=SCJVEREECH|'''[[SCJVEREECH]]''' |
|||
Retro_goblin_icon.png|link=2024 April Fools Event#Retro Goblino|'''[[2024 April Fools Event#Retro Goblino|EL GOBLINO]]''' |
|||
Retro_jeff_icon.png|link=2024 April Fools Event#Retro Jeff|'''[[2024 April Fools Event#Retro Jeff|JEFF]]''' |
|||
Retro_bob_icon.png|link=2024 April Fools Event#Retro Bob|'''[[2024 April Fools Event#Retro Bob|BOB]]''' |
|||
</gallery></div> |
</gallery></div> |
||
{| style="width:100%; text-align:center; padding: 20px:" |
|||
! colspan=5 style="font-size:130%" | |
|||
<p style="margin:0"><b>NON-CANON</b></p> |
|||
|} |
|} |
||
|-| Miscellaneous = |
|||
<div class="hoverimg-dim"> |
|||
<gallery navigation="true" captionalign="center" widths="320" bordercolor="#D0AE82" bordersize="medium" position="center"> |
|||
Haunt Bob Icon.png|link=Bob|'''[[Bob|BOB]]''' |
|||
Troll A-60.png|link=A-60|'''[[A-60|TROLL A-60]]''' |
|||
PumpkinSally.png|link=Window|'''[[Window|WINDOW]]''' |
|||
Buff figure new.png|link=Figure|'''[[Figure|BUFF FIGURE]]''' |
|||
Seekandchampagne.jpeg|link=Seek|'''[[Seek|SEEK IN SUIT]]''' |
|||
Drip Goku.jpg|link=Secrets|'''[[Secrets|DRIP GOKU]]''' |
|||
Seekdrip.png|link=Seek|'''[[Seek|DRIP SEEK]]''' |
|||
Builderman.png|link=Secrets|'''[[Secrets|BUILDERMAN]]''' |
|||
Ambush Icon1.png|link=Ambush|'''[[Ambush|ANTICHEAT]]''' |
|||
GiggleShades.png|link=Giggle|'''[[Giggle|DRIPPED GIGGLE]]''' |
|||
</gallery></div> |
|||
{| style="width:100%; text-align:center; padding: 20px:" |
|||
! colspan=5 style="font-size:130%" | |
|||
<p style="margin:0"><b>RUSH CLONES</b></p> |
|||
|} |
|||
<div class="hoverimg-dim"> |
|||
<gallery navigation="true" captionalign="center" widths="320" bordercolor="#D0AE82" bordersize="medium" position="center"> |
|||
....better.png|link=Rush Clones|'''[[Rush Clones|....]]''' |
|||
Bald man.png|link=Secrets|'''[[Secrets|BALD KREEK]]''' |
|||
Banana thump.png|link=Rush Clones|'''[[Rush Clones|BANANA THUMP]]''' |
|||
Barrage.png|link=Rush Clones|'''[[Rush Clones|BARRAGE]]''' |
|||
CreakAprilFools.png|link=Rush Clones|'''[[Rush Clones|CREAK]]''' |
|||
Depth.png|link=Rush Clones|'''[[Rush Clones|DEPTH]]''' |
|||
GoblinoJumpscare.png|link=Rush Clones|'''[[Rush Clones|EL GOBLINO REAL]]''' |
|||
Free Robloxian Outfit.png|link=Rush Clones|'''[[Rush Clones|FREE ROBLOXIAN OUTFIT]]''' |
|||
Matcher.png|link=Rush Clones|'''[[Rush Clones|MATCHER]]''' |
|||
Nachovarga temp.png|link=Rush Clones|'''[[Rush Clones|NACHO VARGA]]''' |
|||
NIGHTMARE RUSH.png|link=Rush Clones|'''[[Rush Clones|NIGHTMARE RUSH]]''' |
|||
Rahhh!!!.png|link=Rush Clones|'''[[Rush Clones|RAHHH!!!]]''' |
|||
Rsu h better.png|link=Rush Clones|'''[[Rush Clones|RSU H]]''' |
|||
Glitch rush.png|link=Rush Clones|'''[[Rush Clones|RU SH]]''' |
|||
Rushaprilfoolsfunny.png|link=Rush Clones|'''[[Rush Clones|RR.R.RUHHS]]''' |
|||
RUSHOREOFUNNY.png|link=Rush Clones|'''[[Rush Clones|RUSH!!!]]''' |
|||
Screenshot 20221211 114502.png|link=Rush Clones|'''[[Rush Clones|RUSHY]]''' |
|||
Scary red face.png|link=Rush Clones|'''[[Rush Clones|SCARY RED FACE]]''' |
|||
Another rush clone.png|link=Rush Clones|'''[[Rush Clones|SCARY RED FACE]]''' |
|||
Shiny Teeth.png|link=Rush Clones|'''[[Rush Clones|SHINY TEETH]]''' |
|||
SteamHappyRush.png|link=Rush Clones|'''[[Rush Clones|STEAMHAPPY]]''' |
|||
Trollface.png|link=Secrets|'''[[Secrets|TROLLFACE]]''' |
|||
Screenshot 20221211 114502.png|link=Admin Panel|'''[[Admin Panel|AWESOME RUSH]]''' |
|||
HORSE.webp|link=Stream Integration|'''[[Stream Integration|THE STUPID HORSE]]''' |
|||
</gallery></div> |
|||
{| style="width:100%; text-align:center; padding: 20px:" |
|||
! colspan=5 style="font-size:130%" | |
|||
|} |
|||
</div> |
|||
|} |
|||
{| style="width:100%; text-align:center; padding: |
{| style="width:100%; text-align:center; padding:20px" |
||
! colspan=5 style="font-size:170%" | |
! colspan=5 style="font-size:170%" | |
||
<p style="margin:0"> |
<p style="margin:0">'''ALL FLOORS'''</p> |
||
|} |
|} |
||
| Line 390: | Line 271: | ||
! colspan=5 | |
! colspan=5 | |
||
{| style="width:100%; text-align:center; padding: |
{| style="width:100%; text-align:center; padding:20px" |
||
! colspan=5 style="font-size:130%" | |
! colspan=5 style="font-size:130%" | |
||
<p style="margin:0"> |
<p style="margin:0">'''ENTITIES'''</p> |
||
|} |
|} |
||
<div class="hoverimg-dim"><gallery navigation="true" captionalign="center" widths="320" bordercolor="#D0AE82" bordersize="medium" position="center"> |
<div class="hoverimg-dim"><gallery navigation="true" captionalign="center" widths="320" bordercolor="#D0AE82" bordersize="medium" position="center"> |
||
Glitch Icon.png|link=Glitch|'''[[Glitch|GLITCH]]''' |
|||
Seek Icon2.png|link=Seek|'''[[Seek|SEEK]]''' |
|||
Guiding Light List of entities.png|link=Guiding Light|'''[[Guiding Light|GUIDING LIGHT]]''' |
|||
</gallery></div> |
|||
{| style="width:100%; text-align:center; padding: 20px:" |
|||
! colspan=5 style="font-size:130%" | |
|||
<p style="margin:0"><b>RECURRING</b></p> |
|||
|} |
|||
<div class="hoverimg-dim"><gallery navigation="true" captionalign="center" widths="300" bordercolor="#D0AE82" bordersize="medium" position="center"> |
|||
Rush Icon.png|link=Rush|'''[[Rush|RUSH]]''' |
|||
Ambush Icon1.png|link=Ambush|'''[[Ambush|AMBUSH]]''' |
|||
Halt Icon2.png|link=Halt|'''[[Halt|HALT]]''' |
|||
Eyes Icon6.png|link=Eyes|'''[[Eyes|EYES]]''' |
|||
Screech Icon.png|link=Screech|'''[[Screech|SCREECH]]''' |
|||
Seekhandrender.png|link=Seek#Seek Hands|'''[[Seek|SEEK HANDS]]''' |
|||
</gallery> |
</gallery> |
||
</div> |
</div> |
||
{| style="width:100%; text-align:center; padding: 20px:" |
|||
! colspan=5 style="font-size:130%" | |
|||
<p style="margin:0"><b>MISCELLANEOUS</b></p> |
|||
|} |
|} |
||
{| style="width:100%; text-align:center; padding:20px" |
|||
<div class="hoverimg-dim"> |
|||
<gallery navigation="true" captionalign="center" widths="320" bordercolor="#D0AE82" bordersize="medium" position="center"> |
|||
Hide Icon0.png|link=Hide|'''[[Hide|HIDE]]''' |
|||
Jack Icon.png|link=Jack|'''[[Jack|JACK]]''' |
|||
Timothy Icon3.png|link=Timothy|'''[[Timothy|TIMOTHY]]''' |
|||
Windowrender.png|link=Sally|'''[[Sally|SALLY]]''' |
|||
Shadow icon.png|link=Shadow|'''[[Shadow|SHADOW]]''' |
|||
Seek Eye.png|link=Seek#Seek Eyes|'''[[Seek|SEEK EYES]]''' |
|||
</gallery> |
|||
</div> |
|||
|} |
|||
{| style="width:100%; text-align:center; padding: 20px:" |
|||
! colspan=5 style="font-size:170%" | |
! colspan=5 style="font-size:170%" | |
||
<p style="margin:0"> |
<p style="margin:0">'''[[Glitch Fragment|GLITCH FRAGMENT]]'''</p> |
||
|} |
|} |
||
| Line 443: | Line 290: | ||
! colspan=5 | |
! colspan=5 | |
||
{| style="width:100%; text-align:center; padding: |
{| style="width:100%; text-align:center; padding:20px" |
||
! colspan=5 style="font-size:130%" | |
! colspan=5 style="font-size:130%" | |
||
<p style="margin:0"> |
<p style="margin:0">'''ENTITIES'''</p> |
||
|} |
|} |
||
<div class="hoverimg-dim"><gallery navigation="true" captionalign="center" widths="320" bordercolor="#D0AE82" bordersize="medium" position="center"> |
<div class="hoverimg-dim"><gallery navigation="true" captionalign="center" widths="320" bordercolor="#D0AE82" bordersize="medium" position="center"> |
||
Rushglitch.png|link=RNIUSHCg==|'''[[Glitch Fragment#RNIUSHCg==|RNIUSHCg==]]''' |
|||
Ambush_glitch.png|link=AR0xMBUSH|'''[[Glitch Fragment#AR0xMBUSH|AR0XMBUSH]]''' |
|||
Corrupted_Screeches_Icon.png|link=SCJVEREECH|'''[[Glitch Fragment#SCJVEREECH|SCJVEREECH]]''' |
|||
</gallery></div> |
|||
{| style="width:100%; text-align:center; padding: 20px:" |
|||
! colspan=5 style="font-size:130%" | |
|||
<p style="margin:0"><b>ENEMIES</b></p> |
|||
|} |
|||
<div class="hoverimg-dim"><gallery navigation="true" captionalign="center" widths="300" bordercolor="#D0AE82" bordersize="medium" position="center"> |
|||
Seekrendertower Icon.png|link=Seek|'''[[Seek|SEEK]]''' |
|||
RushTowerNew2 Icon.png|link=Rush|'''[[Rush|RUSH]]''' |
|||
AmbushTowerNew Icon.png|link=Ambush|'''[[Ambush|AMBUSH]]''' |
|||
DupeTowerHero Icon.png|link=Dupe|'''[[Dupe|DUPE]]''' |
|||
Jack2 Icon.png|link=Jack|'''[[Jack|JACK]]''' |
|||
HideTowerHeroes Icon.png|link=Hide|'''[[Hide|HIDE]]''' |
|||
ScreechTowerNew2 Icon.png|link=Screech|'''[[Screech|SCREECH]]''' |
|||
TimothyTowerNew Icon.png|link=Timothy|'''[[Timothy|TIMOTHY]]''' |
|||
HaltTowerNew Icon.png|link=Halt|'''[[Halt|HALT]]''' |
|||
Dorsdoorseyestower Icon.png|link=Eyes|'''[[Eyes|EYES]]''' |
|||
GlitchTower Icon.png|link=Glitch|'''[[Glitch|GLITCH]]''' |
|||
DoorsWindow Icon.png|link=Window|'''[[Window|WINDOW]]''' |
|||
Shadow Tower Icon.png|link=Shadow|'''[[Shadow|SHADOW]]''' |
|||
Sludge Icon.png|link=Tower Heroes Event#Sludge|'''[[Sludge|SLUDGE]]''' |
|||
Hands Icon.png|link=Tower Heroes Event#Hands|'''[[Hands|HANDS]]''' |
|||
Hole Icon.png|link=Tower Heroes Event#Hole|'''[[Hole|HOLE]]''' |
|||
Timothy Junior Icon.png|link=Tower Heroes Event#Timothy Jr.|'''[[Timothy Jr|TIMOTHY JR.]]''' |
|||
Voided Icon.png|link=Tower Heroes Event#Voided|'''[[Voided|VOIDED]]''' |
|||
</gallery> |
</gallery> |
||
</div> |
</div> |
||
{| style="width:100%; text-align:center; padding: 20px:" |
|||
! colspan=5 style="font-size:130%" | |
|||
<p style="margin:0"><b>Followers</b></p> |
|||
|} |
|} |
||
{| style="width:100%; text-align:center; padding:20px" |
|||
<div class="hoverimg-dim"><gallery navigation="true" captionalign="center" widths="300" bordercolor="#D0AE82" bordersize="medium" position="center"> |
|||
BuffFigure Icon.png|link=Figure|'''[[Figure|BUFF FIGURE]]''' |
|||
BabyFigure Icon.png|link=Figure|'''[[Figure|SMALL FIGURE]]''' |
|||
FancySeekSit Icon.png|link=Seek|'''[[Seek|FANCY SEEK]]''' |
|||
SeekInAJeep Icon.png|link=Seek|'''[[Seek|JEEP SEEK]]''' |
|||
AngryAmbush Icon.png|link=Ambush|'''[[Ambush|ANGRY AMBUSH]]''' |
|||
GoblinoScreamNew Icon.png|link=El Goblino|'''[[El Goblino|SCREAMING EL GOBLINO]]''' |
|||
DOORS-Bob Icon.png|link=Bob|'''[[Bob|BOB]]''' |
|||
Guiding Light Tower Icon.png|link=Guiding Light|'''[[Guiding Light|GUIDING LIGHT]]''' |
|||
A-90 icon.png|link=A-90|'''[[A-90]]''' |
|||
KingElGoblino.png|link=El Goblino|'''[[El Goblino|KING EL GOBLINO]]''' |
|||
Figureegg.png|link=Figure|'''[[Figure|FIGURE EGG]]''' |
|||
</gallery> |
|||
{| style="width:100%; text-align:center; padding: 20px:" |
|||
! colspan=5 style="font-size:130%" | |
|||
<p style="margin:0"><b>HEROES</b></p> |
|||
|} |
|||
<div class="hoverimg-dim"> |
|||
<gallery navigation="true" captionalign="center" widths="320" bordercolor="#D0AE82" bordersize="medium" position="center"> |
|||
ElGoblinoTower Icon.png|link=El Goblino|'''[[El Goblino|EL GOBLINO]]''' |
|||
BobFractureLevel1 Icon.png|link=Bob|'''[[Bob|BOB]]''' |
|||
FigureChefLevel1 Icon.png|link=Figure|'''[[Figure|FIGURE]]''' |
|||
DOORS-Jeff Icon.png|link=Jeff|'''[[Jeff|JEFF]]''' |
|||
RushKartKidLevel2 Icon.png|link=Tower Heroes Event#Hider|'''[[Tower Heroes Event#Hider|HIDER]]''' |
|||
</gallery> |
|||
{| style="width:100%; text-align:center; padding: 20px:" |
|||
! colspan=5 style="font-size:130%" | |
|||
<p style="margin:0"><b>SUMMONS</b></p> |
|||
|} |
|||
<div class="hoverimg-dim"> |
|||
<gallery navigation="true" captionalign="center" widths="320" bordercolor="#D0AE82" bordersize="medium" position="center"> |
|||
TrapWood Icon.png|link=Tower Heroes Event#Wood|'''[[Tower Heroes Event#Wood|WOOD]]''' |
|||
TrapSeek Icon.png|link=Seek|'''[[Seek|SEEK]]''' |
|||
TrapBob Icon.png|link=Bob|'''[[Bob|BOB]]''' |
|||
Snare 29.png|link=Snare|'''[[Snare|SNARE]]''' |
|||
Fleshy Icon.png|link=Tower Heroes Event#Meat|'''[[Tower Heroes Event#Meat|MEAT]]''' |
|||
TrapCrux Icon.png|link=Crucifix|'''[[Crucifix|CRUCIFIX]]''' |
|||
</gallery> |
|||
{| style="width:100%; text-align:center; padding: 20px:" |
|||
! colspan=5 style="font-size:130%" | |
|||
<p style="margin:0"><b>OTHER</b></p> |
|||
<div class="hoverimg-dim"> |
|||
<gallery navigation="true" captionalign="center" widths="320" bordercolor="#D0AE82" bordersize="medium" position="center"> |
|||
Curious Light Icon.png|link=Curious Light|'''[[Curious Light|CURIOUS LIGHT]]''' |
|||
RedSparkles.png|link=Tower Heroes Event#Mischievous Light|'''[[Red Light|RED LIGHT]]''' |
|||
</gallery> |
|||
|} |
|||
</div> |
|||
|} |
|||
{| style="width:100%; text-align:center; padding: 20px:" |
|||
! colspan=5 style="font-size:170%" | |
! colspan=5 style="font-size:170%" | |
||
<p style="margin:0"> |
<p style="margin:0">'''[[Admin Panel|ADMIN PANEL EXCLUSIVE]]'''</p> |
||
|} |
|} |
||
| Line 550: | Line 311: | ||
! colspan=5 | |
! colspan=5 | |
||
{| style="width:100%; text-align:center; padding: |
{| style="width:100%; text-align:center; padding:20px" |
||
! colspan=5 style="font-size:130%" | |
! colspan=5 style="font-size:130%" | |
||
<p style="margin:0"> |
<p style="margin:0">'''ENTITIES'''</p> |
||
|} |
|} |
||
<div class="hoverimg-dim"><gallery navigation="true" captionalign="center" widths="320" bordercolor="#D0AE82" bordersize="medium" position="center"> |
<div class="hoverimg-dim"><gallery navigation="true" captionalign="center" widths="320" bordercolor="#D0AE82" bordersize="medium" position="center"> |
||
Screenshot 20221211 114502.png|link=Custom Entities|'''[[Custom Entities|CUSTOM ENTITIES]]''' |
|||
Astaroid Screech render.png|link=Tales Of Tanorio Collab|'''[[Tales Of Tanorio Collab|SCREECH ASTAROID]]''' |
|||
Lampyro-Scarecrow-Model.webp|link=Tales Of Tanorio Collab|'''[[Tales Of Tanorio Collab|SCARECROW LAMPYRO]]''' |
|||
Illuseer-Model.webp|link=Tales Of Tanorio Collab|'''[[Tales Of Tanorio Collab|ILLUSEER]]''' |
|||
Capture d écran 2024-11-24 205927-removebg-preview.png|link=Tales Of Tanorio Collab|'''[[Tales Of Tanorio Collab|TOT LIGHT]]''' |
|||
</gallery></div> |
|||
{| style="width:100%; text-align:center; padding: 20px:" |
|||
! colspan=5 style="font-size:130%" | |
|||
<p style="margin:0"><b>RECURRING</b></p> |
|||
|} |
|||
<div class="hoverimg-dim"><gallery navigation="true" captionalign="center" widths="300" bordercolor="#D0AE82" bordersize="medium" position="center"> |
|||
Marbawl alternate render transparent bg.png|link=Tales Of Tanorio Collab|'''[[Tales Of Tanorio Collab|MARBRAWL]]''' |
|||
Termitator in game.png|link=Tales Of Tanorio Collab|'''[[Tales Of Tanorio Collab|VAMPIRE TERMINATOR]]''' |
|||
Arboghoul-Model.webp|link=Tales Of Tanorio Collab|'''[[Tales Of Tanorio Collab|ARBOGHOUL]]''' |
|||
</gallery> |
</gallery> |
||
</div> |
</div> |
||
{| style="width:100%; text-align:center; padding: 20px:" |
|||
! colspan=5 style="font-size:130%" | |
|||
<p style="margin:0"><b>MISCELLANEOUS</b></p> |
|||
|} |
|} |
||
|-| Upcoming= |
|||
{| style="width:100%; text-align:center; padding:20px" |
|||
<div class="hoverimg-dim"> |
|||
<gallery navigation="true" captionalign="center" widths="320" bordercolor="#D0AE82" bordersize="medium" position="center"> |
|||
EctoRenderTransparent.png|link=Tales Of Tanorio Collab|'''[[Tales Of Tanorio Collab|ECTO]]''' |
|||
Nurse TOT transparent bg.png|link=Tales Of Tanorio Collab|'''[[Tales Of Tanorio Collab|NURSE]]''' |
|||
Jachnid.png|link=Tales Of Tanorio Collab|'''[[Tales Of Tanorio Collab|JACHNID]]''' |
|||
Sungadeem Figure new render.png|link=Tales Of Tanorio Collab|'''[[Tales Of Tanorio Collab|SUNGADEM FIGURE]]''' |
|||
Sweebone-Model.webp|link=Tales Of Tanorio Collab|'''[[Tales Of Tanorio Collab|SWEEBONE]]''' |
|||
Drippo no BG.png|link=Tales Of Tanorio Collab|'''[[Tales Of Tanorio Collab|DRIPPO]]''' |
|||
ToT Seek.png|link=Seek|'''[[Seek|SEEK]]''' |
|||
</gallery> |
|||
</div> |
|||
|} |
|||
{| style="width:100%; text-align:center; padding: 20px:" |
|||
! colspan=5 style="font-size:170%" | |
! colspan=5 style="font-size:170%" | |
||
<p style="margin:0"> |
<p style="margin:0">'''[[The Outdoors|THE OUTDOORS]]'''</p> |
||
|} |
|} |
||
| Line 601: | Line 331: | ||
! colspan=5 | |
! colspan=5 | |
||
{| style="width:100%; text-align:center; padding: |
{| style="width:100%; text-align:center; padding:20px" |
||
! colspan=5 style="font-size:130%" | |
! colspan=5 style="font-size:130%" | |
||
<p style="margin:0"> |
<p style="margin:0">'''MAIN'''</p> |
||
|} |
|} |
||
<div class="hoverimg-dim"><gallery navigation="true" captionalign="center" widths="320" bordercolor="#D0AE82" bordersize="medium" position="center"> |
<div class="hoverimg-dim"><gallery navigation="true" captionalign="center" widths="320" bordercolor="#D0AE82" bordersize="medium" position="center"> |
||
Snareicon3.png|link=Snare|'''[[Snare|SNARE]]''' |
|||
Groundskeeper icon.png|link=The Outdoors#Groundskeeper|'''[[The Outdoors#Groundskeeper|GROUNDSKEEPER]]''' |
|||
Scrapped Figure Model Icon.png|link=Figue|'''[[Figure|FIGURE V2]]''' |
|||
Crows icon.png|link=The Outdoors#Crows/Ravens|'''[[The Outdoors#Crows/Ravens|'''CAWS''']] |
|||
2018 Figure Icon.png|link=Figue|'''[[Figure|FIGURE V1]]''' |
|||
Curious Light Icon.png|link=Curious Light|'''[[Curious Light|CURIOUS LIGHT]]''' |
|||
Grumble Old Icon.png|link=Grumble|'''[[Grumble|GRUMBLE V1]]''' |
|||
Haste Old Icon.png|link=Haste|'''[[Haste|HASTE V1]]''' |
|||
</gallery> |
</gallery> |
||
</div> |
|||
{| style="width:100%; text-align:center; padding: 20px:" |
|||
! colspan=5 style="font-size:130%" | |
|||
<p style="margin:0"><b>RECURRING</b></p> |
|||
|} |
|} |
||
{| style="width:100%; text-align:center; padding:20px" |
|||
<div class="hoverimg-dim"><gallery navigation="true" captionalign="center" widths="320" bordercolor="#D0AE82" bordersize="medium" position="center"> |
|||
Ambush Really Old Icon.png|link=Ambush|'''[[Ambush|AMBUSH V1]]''' |
|||
Ambush Original Icon.png|link=Ambush|'''[[Ambush|AMBUSH V2]]''' |
|||
Eyes Lookman Old Icon.png|link=Lookman|'''[[Lookman|LOOKMAN V1]]''' |
|||
Lookman Old Icon.png|link=Lookman|'''[[Lookman|LOOKMAN V2]]''' |
|||
Unused Eyes Icon.png|link=Eyes|'''[[Eyes|EYES V2]]''' |
|||
Dupe Old Icon.png|link=Dupe|'''[[Dupe|DUPE V1]]'' |
|||
</gallery> |
|||
{| style="width:100%; text-align:center; padding: 20px:" |
|||
! colspan=5 style="font-size:130%" | |
|||
<p style="margin:0"><b>MISCELLANEOUS</b></p> |
|||
|} |
|||
<div class="hoverimg-dim"><gallery navigation="true" captionalign="center" widths="320" bordercolor="#D0AE82" bordersize="medium" position="center"> |
|||
Mobble Icon.png|link=Jack|'''[[Jack|MOBBLE]]''' |
|||
Old Timothy Icon.png|link=Timothy|'''[[Timothy|TIMOTHY V1]]''' |
|||
Old El Goblino.png|link=El Goblino|'''[[El Goblino|EL GOBLINO V1]]''' |
|||
Bob Icon2.png|link=Bob|'''[[Bob|BOB V1]]''' |
|||
Teaserbyredibles3.png|link=Removed and Scrapped Content|'''[[Removed and Scrapped Content|SKETCH]]''' |
|||
</gallery> |
|||
</div> |
|||
|} |
|||
{| style="width:100%; text-align:center; padding: 20px:" |
|||
! colspan=5 style="font-size:170%" | |
! colspan=5 style="font-size:170%" | |
||
<p style="margin:0"> |
<p style="margin:0">'''[[Floor 3|FLOOR 3]]'''</p> |
||
|} |
|} |
||
| Line 652: | Line 353: | ||
! colspan=5 | |
! colspan=5 | |
||
{| style="width:100%; text-align:center; padding: |
{| style="width:100%; text-align:center; padding:20px" |
||
! colspan=5 style="font-size:130%" | |
! colspan=5 style="font-size:130%" | |
||
<p style="margin:0"> |
<p style="margin:0">'''Unknown'''</p> |
||
|} |
|} |
||
<div class="hoverimg-dim"><gallery navigation="true" captionalign="center" widths="320" bordercolor="#D0AE82" bordersize="medium" position="center"> |
<div class="hoverimg-dim"><!--<gallery navigation="true" captionalign="center" widths="320" bordercolor="#D0AE82" bordersize="medium" position="center"> |
||
Groundskeeper icon.png|link=The Outdoors#Groundskeeper|'''[[The Outdoors#Groundskeeper|GROUNDSKEEPER]]''' |
|||
Figure Outfit.png|link=Figure|'''[[Figure|FIGURE OUTFIT]]''' |
|||
Crows icon.png|link=The Outdoors#Crows/Ravens|'''[[The Outdoors#Crows/Ravens|'''CROWS/RAVENS''']] |
|||
El Goblino Onesie.png|link=El Goblino|'''[[El Goblino|EL GOBLINO ONESIE]]''' |
|||
Curious Light Icon.png|link=Curious Light|'''[[Curious Light|CURIOUS LIGHT]]''' |
|||
</gallery>--> |
|||
Seeked Outfit.png|link=Seek|'''[[Seek|SEEKED]]''' |
|||
Unknown |
|||
</gallery> |
|||
{| style="width:100%; text-align:center; padding: 20px:" |
|||
! colspan=5 style="font-size:130%" | |
|||
<p style="margin:0"><b>Effects</b></p> |
|||
|} |
|||
<div class="hoverimg-dim"><gallery navigation="true" captionalign="center" widths="320" bordercolor="#D0AE82" bordersize="medium" position="center"> |
|||
Gooped Tag Effect.png|link=Seek|'''[[Seek|GOOPED]]''' |
|||
Rush Tag Effect.png|link=Rush|'''[[Rush|RUSH]]''' |
|||
Crucifix Tag Effect.png|link=Crucifix|'''[[Crucifix|CRUCIFIX]]''' |
|||
</gallery> |
|||
</div> |
</div> |
||
|} |
|||
{| style="width:100%; text-align:center; padding: 20px:" |
|||
! colspan=5 style="font-size:170%" | |
|||
<p style="margin:0"><b>[[Merchandise|MERCHANDISE]]</b></p> |
|||
|} |
|} |
||
</tabber> |
|||
{| class="table home-container" style="width:100%; border-radius:1em; text-align:center; padding:5px" |
|||
! colspan=5 | |
|||
== {{Icons|Overview}} Overview == |
|||
{| style="width:100%; text-align:center; padding: 20px:" |
|||
''Entities'' are the main antagonists of the [[DOORS|''game'']]. Most of them try to [[Damage|kill]] the [[players]] in different ways, however, some, like [[Jeff]] or [[Guiding Light]], are friendly towards the player. Some ''entities'' instantly kill the player, these are: |
|||
! colspan=5 style="font-size:130%" | |
|||
<p style="margin:0"><b>UGC</b></p> |
|||
|} |
|||
* [[Seek]] |
|||
<div class="hoverimg-dim"><gallery navigation="true" captionalign="center" widths="320" bordercolor="#D0AE82" bordersize="medium" position="center"> |
|||
* [[Figure]] |
|||
RushMask.webp|link=Rush|'''[[Rush|RUSH MASK]]''' |
|||
* [[Dread]] |
|||
JackMask.webp|link=Jack|'''[[Jack|JACK MASK]]''' |
|||
* [[The Rooms#Entities|A-120]] |
|||
RushBandana.webp|link=Rush|'''[[Rush|RUSH BANDANA]]''' |
|||
* [[The Backdoor#Entities|Haste]] |
|||
Jack-o%27-lanternHead.webp|link=Merchandise|'''[[Merchandise|JACK O' LANTERN HEAD]]''' |
|||
* [[Seek|Seek Hands]] (Hotel - Grand Hallway only) |
|||
CarvedpumpkinHead.webp|link=Merchandise|'''[[Merchandise|CARVED PUMPKIN HEAD]]''' |
|||
* [[Seek|Seek Sludge]] |
|||
LSPLASH_YOU_SOULD_DELETE_SCREECH_AND_GIVE_ME_FREE_ROBUX_SLASH_J.png|link=Screech|'''[[Screech|SCREECH HEAD]]''' |
|||
* [[Seek|Seek Worm]] |
|||
Veins.png|link=Seek|'''[[Seek|SEEKS EYE 2.0 (WITH VEINS)]]''' |
|||
* [[Rush]] ([[2023 April Fools Event|SUPER HARD MODE!!!]], HOTEL-) |
|||
No_Veins%3F.png|link=Seek|'''[[Seek|SEEKS EYE 2.0 (NO VEINS)]]''' |
|||
* [[Ambush]] (SUPER HARD MODE!!!, HOTEL-) |
|||
Screech_Bag.png|link=Screech|'''[[Screech|SCREECH BAG]]''' |
|||
* Bob (SUPER HARD MODE!!!) |
|||
Figure%27s_Head.png|link=Figure|'''[[Figure|FIGURES HEAD]]''' |
|||
* Rush Clones |
|||
Figure_Headphones.png|link=Figure|'''[[Figure|FIGURE HEADPHONES]]''' |
|||
* Jeep Seek |
|||
Seek_Headphones.png|link=Seek|'''[[Seek|SEEK HEADPHONES]]''' |
|||
Screech_Headphones.png|link=Screech|'''[[Screech|SCREECH HEADPHONES]]''' |
|||
Seek%27s_New_Whip.png|link=Seek|'''[[Seek|SEEKS NEW WHIP]]''' |
|||
A-90UGC.png|link=A-90|'''[[A-90|A-90]]''' |
|||
El_Goblino_Head_UGC.png|link=El Goblino|'''[[El Goblino|EL GOBLINOS HEAD]]''' |
|||
Jeff_Backpack_UGC.png|link=Jeff|'''[[Jeff|JEFF BACKPACK]]''' |
|||
El_Goblino_UGC.png|link=El Goblino|'''[[El Goblino|EL GOBLINO]]''' |
|||
Screech_MaskUGC.png|link=Screech|'''[[Screech|SCREECH MASK]''' |
|||
Timothy_Jr..png|link=Timothy|'''[[Timothy|TIMOTHY JR]''' |
|||
Timothy.png|link=Timothy|'''[[Timothy|TIMOTHY]''' |
|||
Figure_Hood.png|link=Figure|'''[[Figure|FIGURE HOOD]]''' |
|||
</gallery> |
|||
{| style="width:100%; text-align:center; padding: 20px:" |
|||
! colspan=5 style="font-size:130%" | |
|||
<p style="margin:0"><b>Makeship</b></p> |
|||
|} |
|||
<div class="hoverimg-dim"><gallery navigation="true" captionalign="center" widths="320" bordercolor="#D0AE82" bordersize="medium" position="center"> |
|||
Screech_Plushie.png|link=Screech|'''[[Screech|SCREECH PLUSHIE]]''' |
|||
Seek_plushy.webp|link=Seek|'''[[Seek|SEEK PLUSHIE]]''' |
|||
Elgobplush.png|link=El Goblino|'''[[El Goblino|EL GOBLINO PLUSHIE]]''' |
|||
FigurePlushFront.png|link=Figure|'''[[Figure|FIGURE PLUSHIE]]''' |
|||
</gallery> |
|||
{| style="width:100%; text-align:center; padding: 20px:" |
|||
! colspan=5 style="font-size:130%" | |
|||
<p style="margin:0"><b>Youtooz</b></p> |
|||
|} |
|||
<div class="hoverimg-dim"><gallery navigation="true" captionalign="center" widths="320" bordercolor="#D0AE82" bordersize="medium" position="center"> |
|||
Seek_Vinyl_Statue.png|link=Seek|'''[[Seek|SEEK YOUTOOZ]]''' |
|||
ElGoblinoYoutoozTransparent.png|link=El Goblino|'''[[El Goblino|KING EL GOBLINO YOUTOOZ]]''' |
|||
FigureYoutoozTransparent.png|link=Figure|'''[[Figure|BUFF FIGURE YOUTOOZ]]''' |
|||
</gallery> |
|||
{| style="width:100%; text-align:center; padding: 20px:" |
|||
! colspan=5 style="font-size:130%" | |
|||
<p style="margin:0"><b>Phatmojo</b></p> |
|||
|} |
|||
<div class="hoverimg-dim"><gallery navigation="true" captionalign="center" widths="320" bordercolor="#D0AE82" bordersize="medium" position="center"> |
|||
HaltFigure.png|link=Halt|'''[[Halt|HALT MINIFIGURE]]''' |
|||
GlitchFigure.png|link=Glitch|'''[[Glitch|GLITCH MINIFIGURE]]''' |
|||
RushFigure.png|link=Rush|'''[[Rush|RUSH MINIFIGURE]]''' |
|||
FigureFigure.png|link=Figure|'''[[Figure|FIGURE MINIFIGURE]]''' |
|||
SeekFigure.png|link=Seek|'''[[Seek|SEEK MINIFIGURE]]''' |
|||
GoblinoFigure.png|link=El Goblino|'''[[El Goblino|EL GOBLINO MINIFIGURE]]''' |
|||
EyesFigure.png|link=Eyes|'''[[Eyes|EYES MINIFIGURE]]''' |
|||
AmbushFigure.png|link=Ambush|'''[[Ambush|AMBUSH MINIFIGURE]]''' |
|||
JackFigure.png|link=Jack|'''[[Jack|JACK MINIFIGURE]]''' |
|||
ScreechFigure.png|link=Screech|'''[[Screech|SCREECH MINIFIGURE]]''' |
|||
Phatmojo Figure Plush.png|link=Figure|'''[[Figure|PHATMOJO FIGURE PLUSH]]''' |
|||
Phatmojo Seek Plushie.png|link=Seek|'''[[Seek|PHATMOJO SEEK PLUSH]]''' |
|||
Screech's Plush (PhatMojo).png|link=Screech|'''[[Screech|PHATMOJO SCREECH PLUSH]]''' |
|||
Phatmojo Glow-in-the-Dark Figure .png|link=Figure|'''[[Figure|GLOWING FIGURE MINIFIGURE]]''' |
|||
Phatmojo Exclusive El Goblino.png|link=El Goblino|'''[[El Goblino|PHATMOJO EL GOBLINO PLUSH]]''' |
|||
Doors Action Figure 3 Pack (series 1).webp|link=Merchandise|'''[[Merchandise|FIGURE, SEEK, AND SCREECH ACTION FIGURES]]''' |
|||
</gallery> |
|||
</div> |
|||
|} |
|||
</tabber> |
|||
=={{Icons|Modifiers}} Modifiers== |
|||
<div style="overflow-y:scroll; height:320px; width:100%;"> |
|||
{{Modifier/2|bordercolor=#f9ffb8|bgcolor=#51561e|textcolor=#f9ffb8|textcolor2=#bcbc88|text=Good Time|text2=Most entities will attack less often.|decrease=50}} |
|||
{{Modifier|bordercolor=#ff9294|bgcolor=#521d1e|textcolor=#ff9294|text=Bad Time|textcolor2=#c16e6e|text2=Most entities will attack more often.|increase=10}} |
|||
{{Modifier|bordercolor=#ff7386|bgcolor=#521f26|textcolor=#ff7386|text=Really Bad Time|textcolor2=#c05865|text2=Most entities will attack much more often.|textcolor3=#c05865|text3=Requires 'Not Five Stars'|increase=20}} |
|||
{{Modifier|bordercolor=#FF272B|bgcolor=#5B0E11|textcolor=#FF272B|text=Worst Time Ever|textcolor2=#D3212D|text2=Entities will unfairly attack constantly.|textcolor3=#D3212D|text3=Requires 'Hotel Hell'|increase=25}} |
|||
{{Modifier|bordercolor=#ffdc4f|bgcolor=#564c22|textcolor=#ffdc4f|text=Room For More|textcolor2=#c0a33d|text2=All entities from The Rooms have a chance to attack.|textcolor3=#c0a33d|text3=Requires 'Back on Track'|increase=20}} |
|||
{{Modifier|bordercolor=#ffdc4f|bgcolor=#564c22|textcolor=#ffdc4f|text=Blitz, Oh|textcolor2=#c0a33d|text2=Blitz from The Backdoor has a chance to attack.|textcolor3=#c0a33d|text3=Requires 'Other Way Around'|increase=5}} |
|||
{{Modifier|bordercolor=#ffdc4f|bgcolor=#564c22|textcolor=#ffdc4f|text=Look, Man|textcolor2=#c0a33d|text2=The Lookman from The Backdoor has a chance to appear.|textcolor3=#c0a33d|text3=Requires 'Other Way Around'|increase=10}} |
|||
{{Modifier|bordercolor=#ffdc4f|bgcolor=#564c22|textcolor=#ffdc4f|text=Vacuum Sealed|textcolor2=#c0a33d|text2=Some doors will lead... nowhere (like in The Backdoor).|textcolor3=#c0a33d|text3=Requires 'Other Way Around'|increase=10}} |
|||
{{Modifier|bordercolor=#ffdc4f|bgcolor=#564c22|textcolor=#ffdc4f|text=Make Haste|textcolor2=#c0a33d|text2=The Backdoor's timer and levers will appear. Haste attacks if the timer hits 0.|textcolor3=#c0a33d|text3=Requires 'Other Way Around'|increase=25}} |
|||
</div> |
|||
=={{Icons|Trivia}} Trivia== |
== {{Icons|Trivia}} Trivia == |
||
* During the development stages for the game, the word " |
* During the development stages for the game, the word "Cryptids" was a potential candidate for the name of the ''entities''. |
||
* [[Seek]] is the first entity that was created for the game. |
|||
*''Entities'' are named by the [[player]], they don't possess real names.<ref>[https://twitter.com/RediblesQW/status/1604347883074883584 fun fact: the entities in DOORS don't really have names. all of their "names" are given to them by the player, which is hinted at through some of the death screens. (e.g. "the one you call ___")] – RediblesQW, Twitter</ref> |
|||
* [[Glitch]] wasn't canon before the Content Update. |
|||
**This doesn't include [[Jeff]], [[Bob]], and [[El Goblino]]. <ref>[https://twitter.com/RediblesQW/status/1627244837358501895?s=20 the 3 entities in jeff shop are the only characters with real names] - RediblesQW, Twitter</ref> |
|||
* The only hostile entities that are unable to kill the player(s) without modifiers are [[Sally]], [[Timothy]] and [[Snare]]. |
|||
** This also seemingly excludes ''entities'' in [[Floors|sub-floors]], as [[Curious Light]] will either name ''entities'' itself (such as [[The Backdoor|Lookman]] and Haste), or share names given by others like Blitz's name. |
|||
*In [[2024 April Fools Event|Retro Mode]] and [[2023 April Fools Event|SUPER HARD MODE!!!]], some ''entities'' have reskins. |
* In [[2024 April Fools Event|Retro Mode]] and [[2023 April Fools Event|SUPER HARD MODE!!!]], some ''entities'' have reskins. |
||
**[[Figure]], [[Rush]], [[Seek]], [[Jack]], [[Ambush]], [[Screech]], [[Eyes]], |
** The [[Figure]], [[Rush]], [[Seek]], [[Jack]], [[Ambush]], [[Screech]], the [[Eyes]], Jeff, Bob, and El Goblino are currently the only ''entities'' that have reskins. |
||
** There are multiple Rush clones exclusive to [[Stream Integration]], the most well known being the STUPID HORSE. |
|||
*Haste and [[Dread]] are the only ''entities'' that use billboard-GUI. |
|||
* |
* Haste, [[Dread]], Jack and [[Shadow]] are the only ''entities'' that use billboard-GUI. |
||
** Rush, Ambush, Eyes, the [[Guiding Light]] and [[Hide]] use particle-emitter, while 3D ''entities'' use meshes. |
|||
*Despite popular belief, [[Snare]] is not a [[List of Hazards|hazard]], but an ''entity.'' |
|||
* Despite popular belief, Snare is not a [[List of Hazards|hazard]], but an ''entity.'' |
|||
*''Entities'' found on main floors can't exit them, while entities on sub-floors are trapped in their sub-floor. |
|||
**This |
** This includes [[The Backdoor#Hazards|Vacuum]] being a hazard. |
||
*The [[Update Logs|Modifiers Update]] is the only |
* The [[Update Logs|Modifiers Update]] is the only major update that didn't add any new ''entities,'' unless you count [[The Three Architects|the third unkown architect]] that is related to the modifiers. |
||
* Players can only obtain the "[[Achievements|In Plain Sight]]" Badge through Rush and Ambush. This is likely an oversight by the [[developers]]. |
|||
*There are 13 fully 2D ''entities:'' Guiding Light, Rush, Ambush, Eyes, Hide, Dread, Jack, [[Shadow]], Curious Light, Blitz, Lookman, Haste, and Greed. |
|||
* There is a scrapped achievement with the title "Thousand Of Many". To obtain it, you must be killed 1000 times by any ''entity''. |
|||
* ''Entities'' are named by the [[player]], they don't possess real names.<ref>[https://twitter.com/RediblesQW/status/1604347883074883584 fun fact: the entities in DOORS don't really have names. all of their "names" are given to them by the player, which is hinted at through some of the death screens. (e.g. "the one you call ___")] – RediblesQW, Twitter</ref> |
|||
** This doesn't include [[Jeff]], [[Bob]] and [[El Goblino]]<ref>[https://twitter.com/RediblesQW/status/1627244837358501895?s=20 the 3 entities in jeff shop are the only characters with real names] - RediblesQW, Twitter</ref>. |
|||
** This also seemingly excludes ''entities'' in [[Floors|sub-floors]], as the [[Curious Light]] will either name ''entities'' itself (such as the [[The Backdoor|Lookman]] and [[Haste]]), or name entities according to an unknown "she" entity, like for Blitz's name. |
|||
* For most of the ''entities'', any pronouns can be used.<ref>https://x.com/LightningSplash/status/1875735744674939126</ref> |
|||
** The only exception is Jeff, El Goblino, Bob and [[Sally]]. |
|||
** [[Eyes]] are referred to as "they". |
|||
** The character that Curious Light called 'she<nowiki/>' is also confirmed to be female, although unknown who it actually is. |
|||
* Some ''entities'' appear to look like animals, such as [[Louie]], [[Timothy]] and the future entities, the Caws. |
|||
** Snare is similar and possibly related to plants. |
|||
** ''Entities'' such as [[Grumble|Grumbles]] and [[Gloombats]] are species that are capable of reproducing. |
|||
* [[Lightning_Splash]]'s favorite ''entity'' in [[DOORS|the game]] is [[Screech]]. |
|||
=={{Icons|Achievement}} Related |
== {{Icons|Achievement}} Related achievements == |
||
<div style="overflow-y:scroll; height:320px; width:100% |
<div style="overflow-y:scroll; height:320px; width:100%"> |
||
{{Achievement |
{{Achievement |
||
|title=One Of Many |
|title=One Of Many |
||
|image=One Of Many Badge.png |
|image=One Of Many Badge.png |
||
|text=You're just getting started. |
|text=You're just getting started. |
||
|text2=Encounter your first death.}} |
|text2=Encounter your first death.}} |
||
{{Achievement |
|||
|title=Ten Of Many |
|title=Ten Of Many |
||
|image=Ten Of Many Badge.png |
|image=Ten Of Many Badge.png |
||
| Line 812: | Line 433: | ||
== {{Icons|History}} History == |
== {{Icons|History}} History == |
||
{{Log|August 10, 2022|[[Rush]], [[Ambush]], [[Seek]], [[Figure]], [[Timothy]], [[Jack]], [[Hide]], [[Screech]], [[Shadow]], [[Guiding Light]], [[Eyes]], [[Halt]], [[Sally]] (Face) were added on release.}}{{Log|August 22, 2022|[[Glitch]] was added.}} |
|||
<div style="overflow-y:scroll; height:320px; width:100%;"> |
|||
{{Log| |
{{Log|January 28, 2023|10 entities were added on the Hotel+ update: [[Jeff]], [[El Goblino]], [[Void]], [[Snare]], [[Dupe]], [[A-60]], [[A-90]], [[A-120]], [[Bob]], [[Curious Light]].}} |
||
{{Log|January 28, 2023 (#2)|Removed [[Sally]].}} |
|||
</div> |
|||
{{Log|March 15, 2024|When the Backdoor released, 4 entities were added: [[Blitz]], [[Lookman]], [[Haste]], [[Dread]].}}{{Log|August 30, 2024|During The Mines' release, 4 entities were added: [[Queen Grumble]], [[Grumble]], [[Giggle]], [[Gloombats]].}} |
|||
=={{Icons|Gallery}} References== |
|||
{{Log|December 20, 2024|2=5 entities were introduced in the Content Update: [[Louie]], [[Sally]] (Re-introduced), [[RNIUSHCg==]], [[AROxMBUSH]], [[SCJVEREECH]].}} |
|||
== {{Icons|Gallery}} References == |
|||
{{Reflist}} |
{{Reflist}} |
||
{{Navigation}} |
{{Navigation}} |
||
[[Category:Lists]] |
[[Category:Lists]] |
||
[[Category:Entities]] |
[[Category:Entities]] |
||
[[Category:Hotel]] |
|||
[[Category:The Mines]] |
|||
[[Category:The Backdoor]] |
[[Category:The Backdoor]] |
||
[[Category:The Rooms]] |
|||
[[ru:Список сущностей]] |
[[ru:Список сущностей]] |
||
[[pt-br: |
[[pt-br:Lista de Entidades]] |
||
[[es:Entidades]] |
[[es:Entidades]] |
||
[[ru:List of Entities]] |
[[ru:List of Entities]] |
||
[[tl:Lista ng mga Entities]] |
[[tl:Lista ng mga Entities]] |
||
[[de:Entitäten]] |
[[de:Entitäten]] |
||
[[fr:Entités]] |
|||
[[Category:Hotel]] |
|||
[[Category:The Hotel]] |
|||
[[Category:The Rooms]] |
|||
[[Category:The Mines]] |
|||
[[Category:Lethal Entities]] |
|||
[[Category:Non-lethal Entities]] |
|||
[[Category:Instakill Entities]] |
|||
Latest revision as of 23:42, 17 July 2025
Entities are the main roadblocks in DOORS. Many of them try to kill players and they must face them in order to advance. They all differ in mechanics and difficulty, along with some being encountered more rarely than others. Certain audio cues or visual imagery can warn the player before an entity spawns in.
 List of Entities
<tabber> |-| The Hotel =
|
|---|


|-| The Mines =
|
|---|

|-| The Backdoor =
|
|---|

|-| The Rooms =
|
|---|
|-| April Fools =
|
|---|
|
|---|
|-| Miscellaneous =
|
ALL FLOORS |
|---|
|
|---|
|
|---|
|
|---|
|-| Upcoming=
|
|---|
Unknown |
|---|
</tabber>
 Overview
Entities are the main antagonists of the game. Most of them try to kill the players in different ways, however, some, like Jeff or Guiding Light, are friendly towards the player. Some entities instantly kill the player, these are:
- Seek
- Figure
- Dread
- A-120
- Haste
- Seek Hands (Hotel - Grand Hallway only)
- Seek Sludge
- Seek Worm
- Rush (SUPER HARD MODE!!!, HOTEL-)
- Ambush (SUPER HARD MODE!!!, HOTEL-)
- Bob (SUPER HARD MODE!!!)
- Rush Clones
- Jeep Seek
 Trivia
- During the development stages for the game, the word "Cryptids" was a potential candidate for the name of the entities.
- Seek is the first entity that was created for the game.
- Glitch wasn't canon before the Content Update.
- The only hostile entities that are unable to kill the player(s) without modifiers are Sally, Timothy and Snare.
- In Retro Mode and SUPER HARD MODE!!!, some entities have reskins.
- Haste, Dread, Jack and Shadow are the only entities that use billboard-GUI.
- Rush, Ambush, Eyes, the Guiding Light and Hide use particle-emitter, while 3D entities use meshes.
- Despite popular belief, Snare is not a hazard, but an entity.
- This includes Vacuum being a hazard.
- The Modifiers Update is the only major update that didn't add any new entities, unless you count the third unkown architect that is related to the modifiers.
- Players can only obtain the "In Plain Sight" Badge through Rush and Ambush. This is likely an oversight by the developers.
- There is a scrapped achievement with the title "Thousand Of Many". To obtain it, you must be killed 1000 times by any entity.
- Entities are named by the player, they don't possess real names.[1]
- This doesn't include Jeff, Bob and El Goblino[2].
- This also seemingly excludes entities in sub-floors, as the Curious Light will either name entities itself (such as the Lookman and Haste), or name entities according to an unknown "she" entity, like for Blitz's name.
- For most of the entities, any pronouns can be used.[3]
- Some entities appear to look like animals, such as Louie, Timothy and the future entities, the Caws.
- Lightning_Splash's favorite entity in the game is Screech.
 Related achievements
|
One Of Many
|
|
Ten Of Many
|
|
Hundred Of Many
|
 History
 References
{{#vardefine:columns|1}}
- ↑ fun fact: the entities in DOORS don't really have names. all of their "names" are given to them by the player, which is hinted at through some of the death screens. (e.g. "the one you call ___") – RediblesQW, Twitter
- ↑ the 3 entities in jeff shop are the only characters with real names - RediblesQW, Twitter
- ↑ https://x.com/LightningSplash/status/1875735744674939126